

How To Upload Html File To Magento
Magento 2 media folder (also chosen Magento 2 media storage) is a useful tool that helps you arrange and approach media files stored on the server. Nonetheless, some people are nevertheless unfamiliar with this term. That'south why we're here to help yous.
This commodity will requite y'all all the things related to the main topic, including:
- An overview of Magento 2 media folder
- An easy guide of Magento upload epitome from Magento media storage
- Steps in Magento upload file
- How to configure static Magento media URL
After on, at that place is a BONUS part which includes instruction relating to Magento media folder permissions. So, delight stay tuned with u.s.!
A Clear Overview of Magento 2 Media Folder

Magento 2 media binder or media storage is regularly placed in the file system on the same server as the Magento program files. The base URL configuration elects the link to the location of media files, and the editor can gain access to data when working on pages or immobile blocks.
In addition, media files can be controlled in a dataset, assault a divided server or content delivery network. We can adjust the editor to employ either static or dynamic media URLs for the content of the catalog in a category or product description.
So, what can we exercise with the Magento 2 media folder?
In media storage, y'all can upload images from the storage and upload files to it, which we will give a clear guide in the adjacent sections. And also, we will provide footstep-by-pace instructions to configure static media URLs likewise. So, let'southward stay tuned with us!
Magento Upload Image from Media Folder
There are several simple steps to add an image, which will be presented as follows:
First of all, you need to open the page or cake to be edited by choosing Content from Admin Sidebar then tapping Pages or Blocks under Elements .
Then, delight select ane of the following methods to add an image:
Method #1: Using WYSIWYG Mode
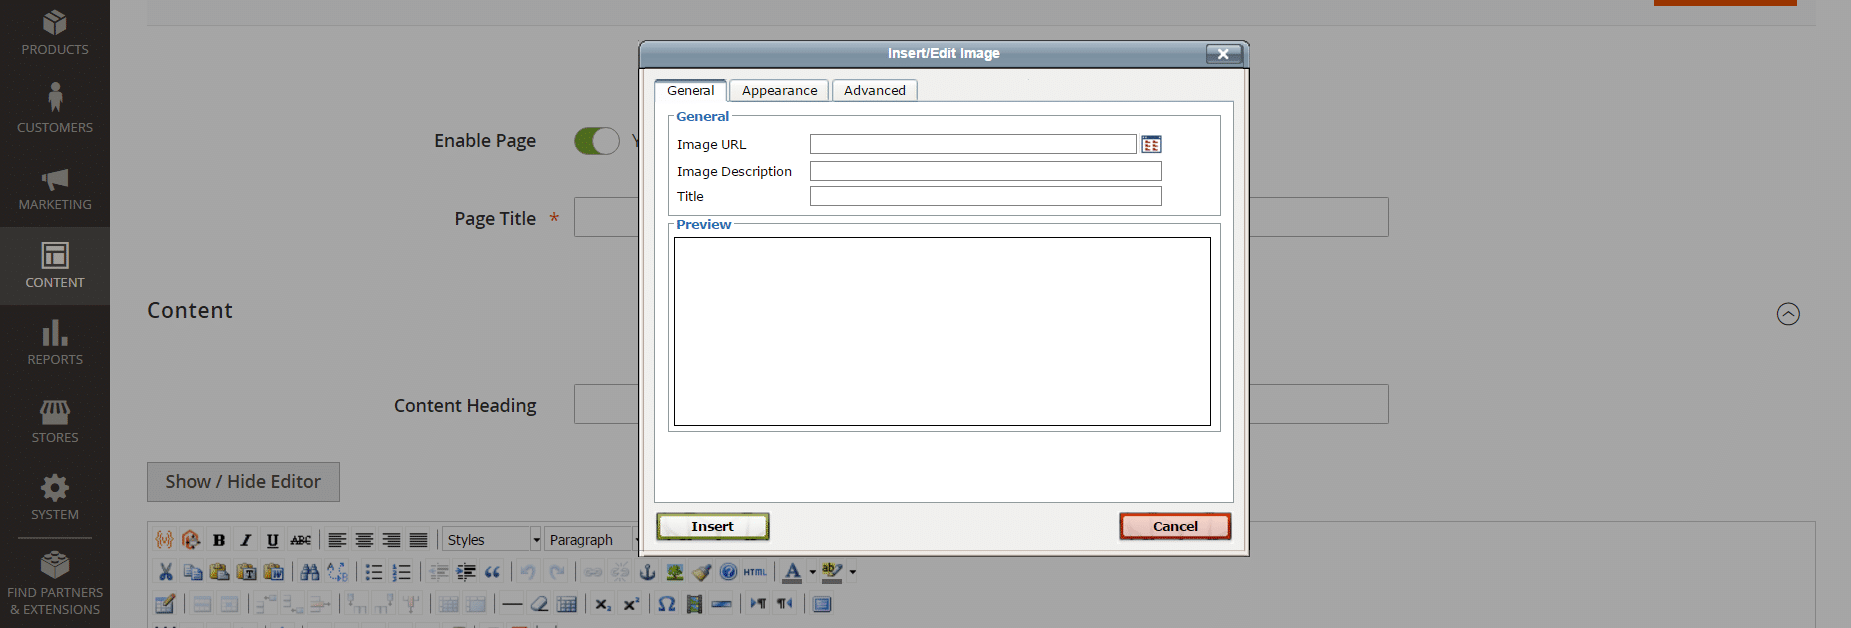
Step one: Click on the Insert Image tab on the toolbar of the WYSIWYG editor
Step 2: Choose Browse after the Image URL department
Stride 3: In the bibliography on the left, select the Magento media folder storing the image
STEP 4: Click on Insert File later on determining the title of the paradigm
Method #ii: Using HTML Style
Using HTML fashion is not as complicated as the previous method.

STEP 1: Identify the cursor in the code containing the <img> tag
STEP ii: Click on Insert Epitome
Magento Upload File – Step-past-footstep Instruction
The initial two steps are equivalent to the way that yous add an image:
STEP 1: On the toolbar of the WYSIWYG editor, tap Insert Image
Footstep two: Select Scan subsequently the Image URL part.
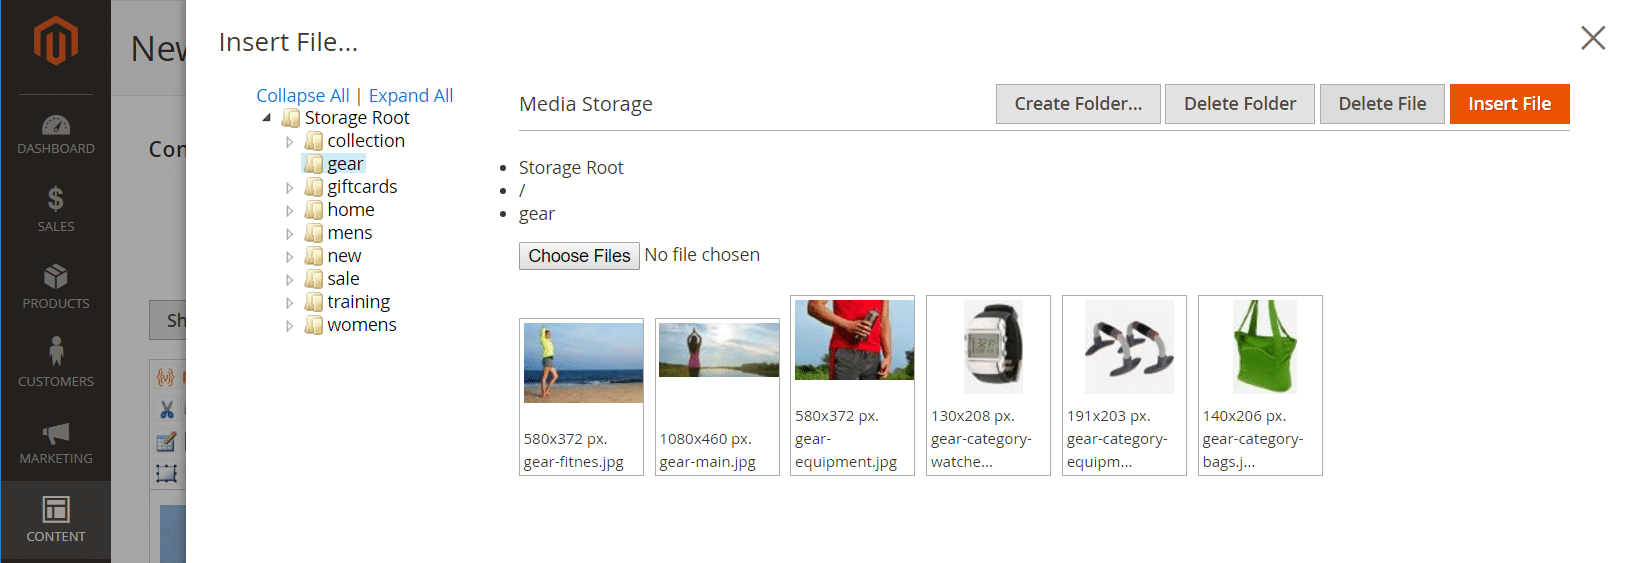
Step iii: Do one of the following in the left directory:
- Get to the Magento media folder that you lot choose to go along the uploaded image.
- Go to the location where you want to add a new folder > Click on Create Folder > Blazon the folder name > Choose OK
STEP 4: Apply Choose Files to upload files and practice the post-obit:
- Move to the place of the images in the index of your local computer
- Choose each image that is to exist uploaded
- Click Open and the images are uploaded to the current media storage file
What Is Magento Media URL & How to Adjust The Static URL?
Introduction to Dynamic Media URL

>>> Read Later: All about URL Rewrites in Magento 2 You Should Know!
A dynamic media URL is divers every bit a relative reference to an paradigm or other media resource. Dynamic media URLs tin can be utilized to connect straightforwardly to resources on your server, or files stored on a content delivery network.
Also, dynamic media URLs can affect itemize operation, and as nosotros have mentioned in the overview, either static or dynamic media URLs can be used to conform the editor.
Like all markup tags, the command is located in double curly braces. Here below is a specific example of a format of dynamic media URL:
{{media url="path/to/image.jpg"}} When rendering the page, dynamic URL directives are candy from HTML content. And every time the page is rendered, the content is scanned for {{media url="…"}} and the corresponding media URL will replace each command.
Nonetheless, we have to note that inserting many directives will have adverse effects when loading the starting time page, and the page is not cached. Therefore, you should employ information technology with caution or discuss it with professional person developers.
Dynamic Media URL vs. Static Media URL

The main difference between static media URL and dynamic media URL is that while static media URL is a stock-still URL, the other volition change whenever you store content in a database and pull for brandish on pages.
Likewise, ii types of URL will wait like this:
- Static URL: http://www.abc.com/xyz/magento.htm
- Dynamic URL: http://abc.com/p/magento-php-sample-lawmaking/issues/detail?id=31
We can run into the divergence between those two types. Also, a dynamic URL is easily recognized as its link contains some special characters like: "?" "=" "&".
Additionally, people sometimes prefer a static URL for several reasons. Just the primary reason is that with the dynamic URL, your page will brandish the aforementioned content just different URLs over time. So that users can inappreciably find the link they are looking for.
And how to switch to a static URL or dynamic URL? Check it out in the next part.
How to Configure Magento Media URL?
The steps to configure the media URL is relatively simple. You lot simply have to change the configuration setting.
STEP 1: Go to Store > Setting > Configuration on the Admin Sidebar
Footstep 2: Click on Content Management in the left panel
Footstep iii: Expand the WYSIWYG Options , and information technology will be displayed as the following paradigm
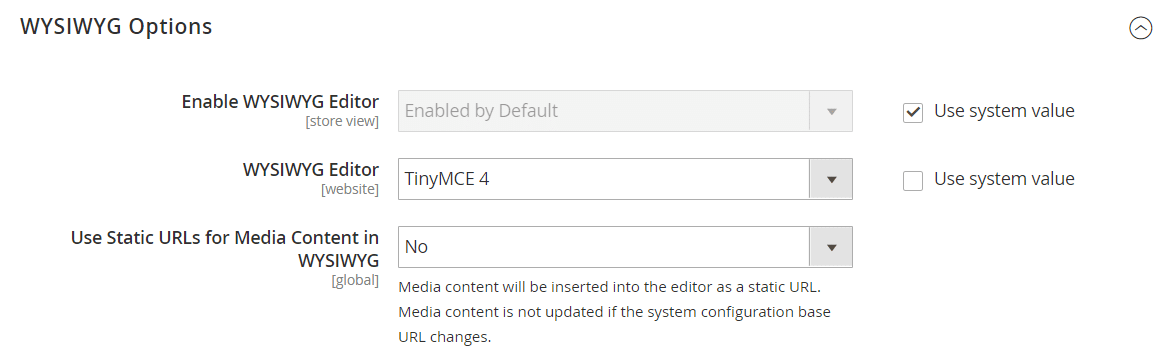
STEP four: Prepare Utilize Static URLs for Media Content in WYSIWYG to:
- Yes: If you want to use static media URL
- No: If you desire to use dynamic media URL
STEP 5: When everything is all done, click on Save Config to terminate
BONUS: How to Create A Magento File System Owner?
Security is i of the most worrying issues in e-commerce. Understanding people'southward concerns, we requite this as a bonus role that you tin set access to Magento media folder permissions to prevent strangers from editing content on your website.
You can create Magento file system with a stiff countersign with these 3 steps:
Pace 1: Run the command below to create the Magento file system possessor:
adduser <username> Stride two: Enter the following command to give it a countersign:
passwd <username> STEP three: Follow the notification displayed on your screen to gear up a password
Conclusion

In this article, y'all must have had details about the Magento ii media folder and some related things. And we hope that you are satisfied with all the information we accept given in this tutorial blog. Therefore, you tin can easily optimize your east-commerce website.
If you demand any help, please feel costless to contact us. Nosotros're 24/vii available.
Thank you a lot for reading!

Source: https://mageguides.com/quick-introduction-media-storage-magento-2/
Posted by: rachalamoved.blogspot.com

0 Response to "How To Upload Html File To Magento"
Post a Comment