

How To Remove White From Photoshop
There are many reasons why you would desire to remove the white groundwork from an image. Maybe you lot don't have a transparent version of your logo or you demand a cutout of your production to create a composite. Thankfully, Adobe Photoshop has enough of options for removing a white groundwork. Really, with Photoshop y'all tin can remove any kind of groundwork, you simply need a little practice.
Permit'due south concentrate on removing a white (or solid colour) background first. The tool and technique you use will depend on the quality of the overall paradigm and its colour. If the prototype which needs to be cutting out has dark colors and no calorie-free colors, you can use the easy Background Eraser or Magic Eraser tools. Nevertheless, for images with light colors or detailed backgrounds, you volition need a more detailed tool and so that you lot don't erase important parts of the image by mistake.
In this tutorial, we will go through removing an image groundwork with the Magic Eraser tool, the Groundwork Eraser tool, and the Quick Selection tool.
Pro Tip: The white and greyness checky filigree is the manufacture standard for transparency. When yous see this grid, you lot know that the background is transparent.
How to Remove the White Groundwork from an Epitome with the Magic Eraser Tool
Step i: Open your prototype
Select the image from your folders an open it with Photoshop. Adjust the paradigm to the centre of the artboard for easy editing admission.
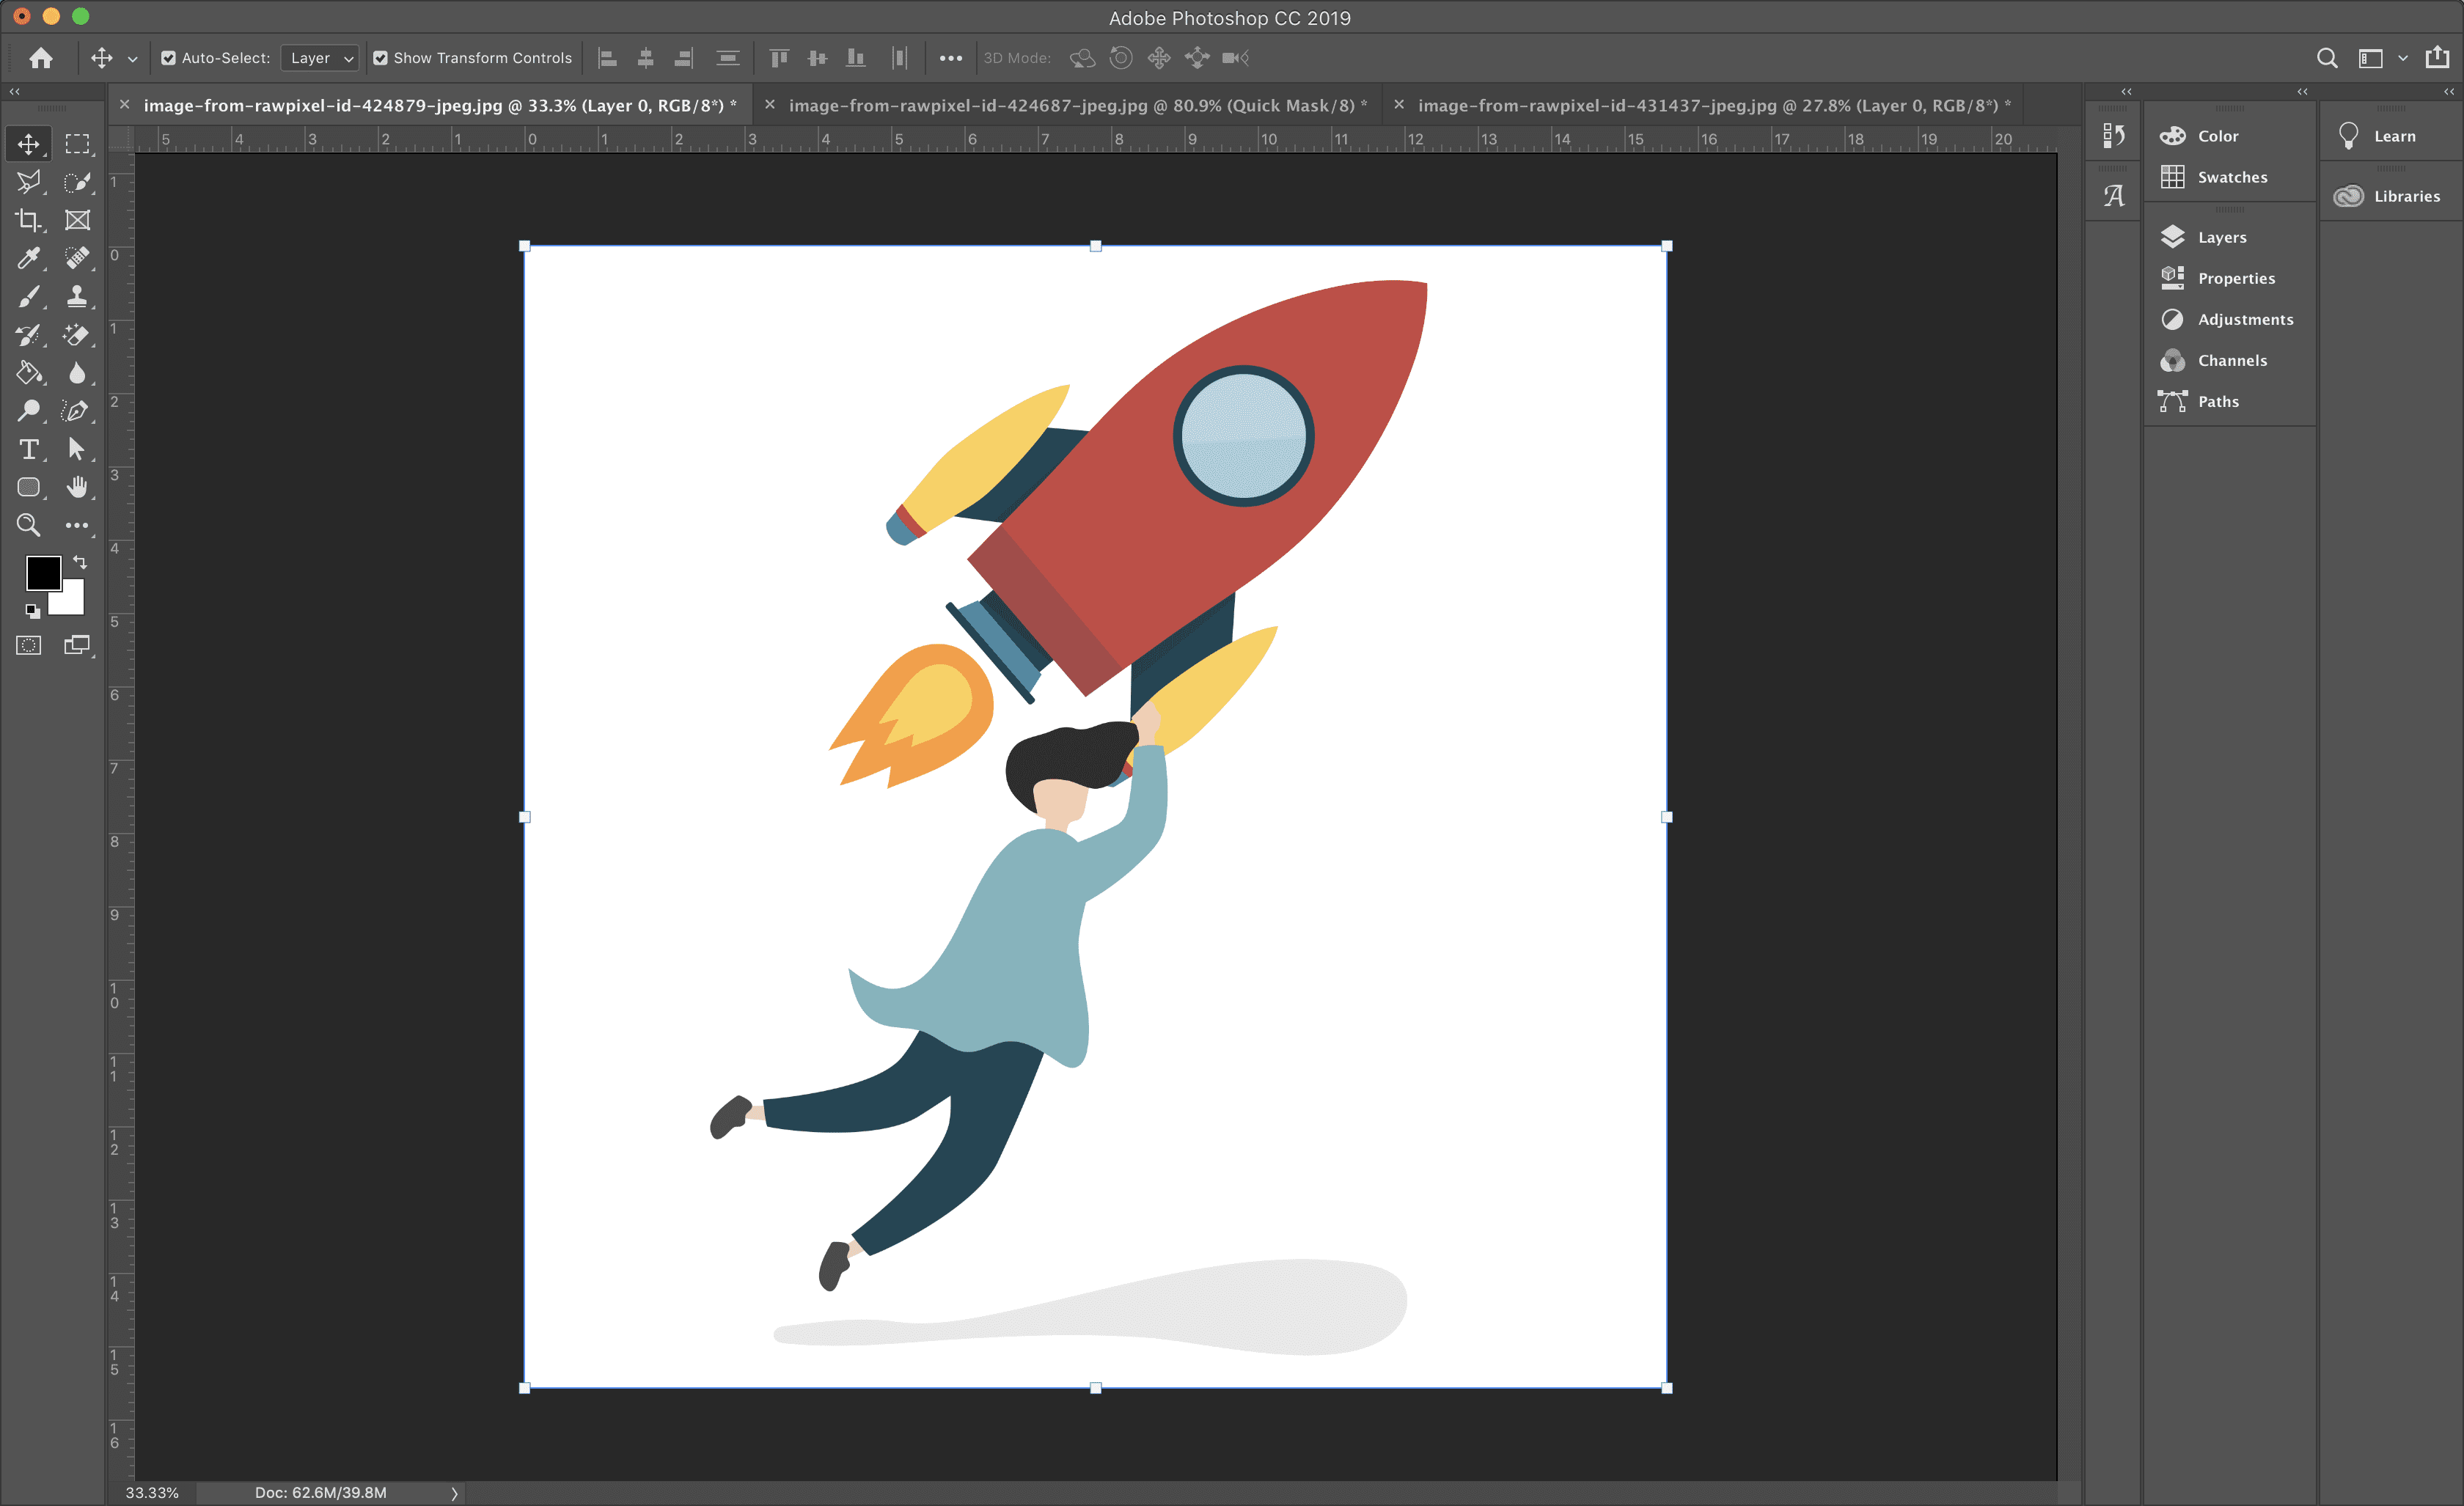
Open and middle your epitome on your dashboard
Step 2: Unlock the layer
In the layers panel, click on the lock to release it and turn into an editable layer. Rename it from "layer 0" to anything descriptive. Alternatively, y'all can make a new layer by duplicating the first and and so hiding it past clicking on the eye. This is just in instance you make a mistake too large to fix.
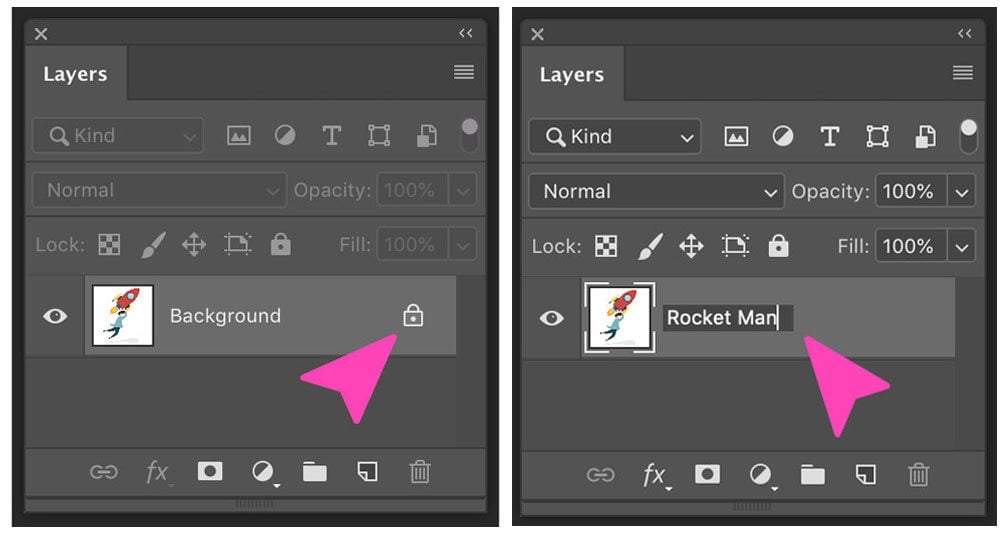
Unlock the layer and rename it
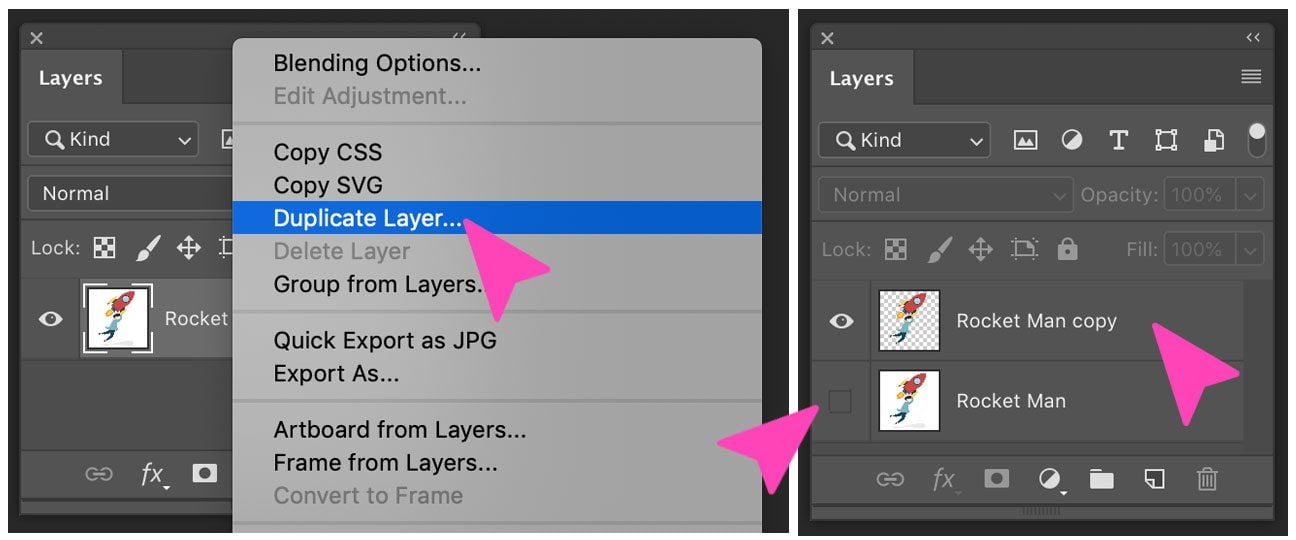
Duplicate, rename and hide the layer
Stride 3: Select the Magic Eraser tool
Select the Magic Eraser tool in the tools panel. Information technology's the tertiary in the eraser tab. Cull the following preferences:
Tolerance: 30
Anti-Alias: checked
Opacity: 100%
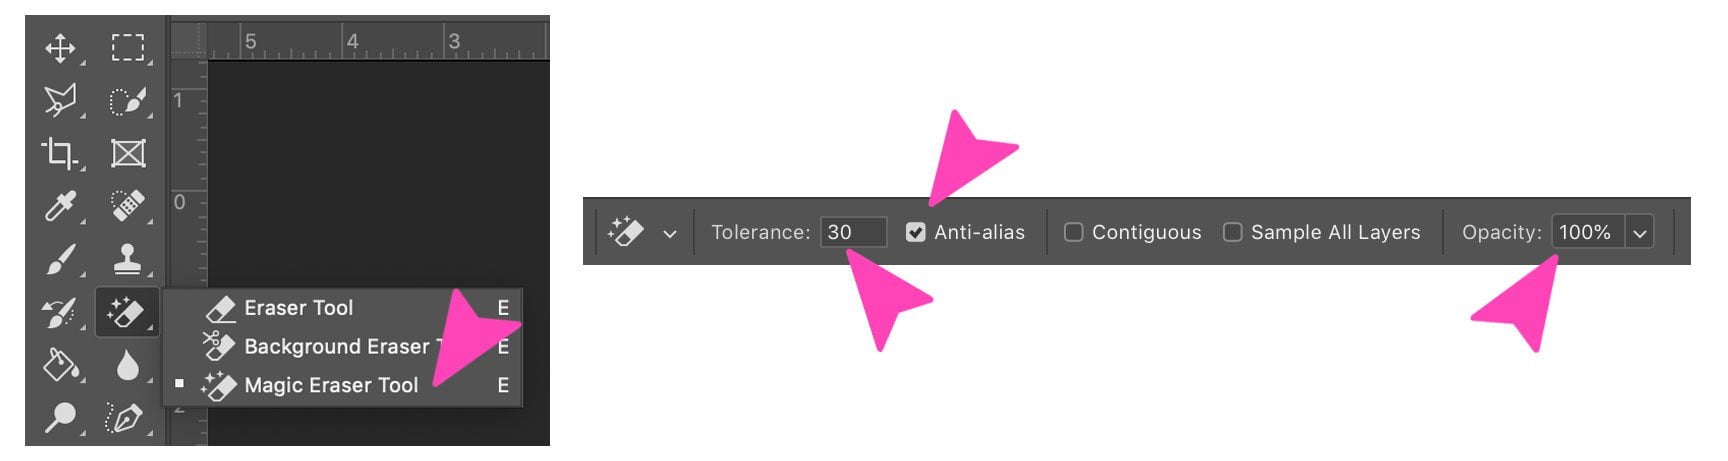
Select the magic eraser tool
Footstep four: Erase the groundwork
Click on the white background and scout it disappear!
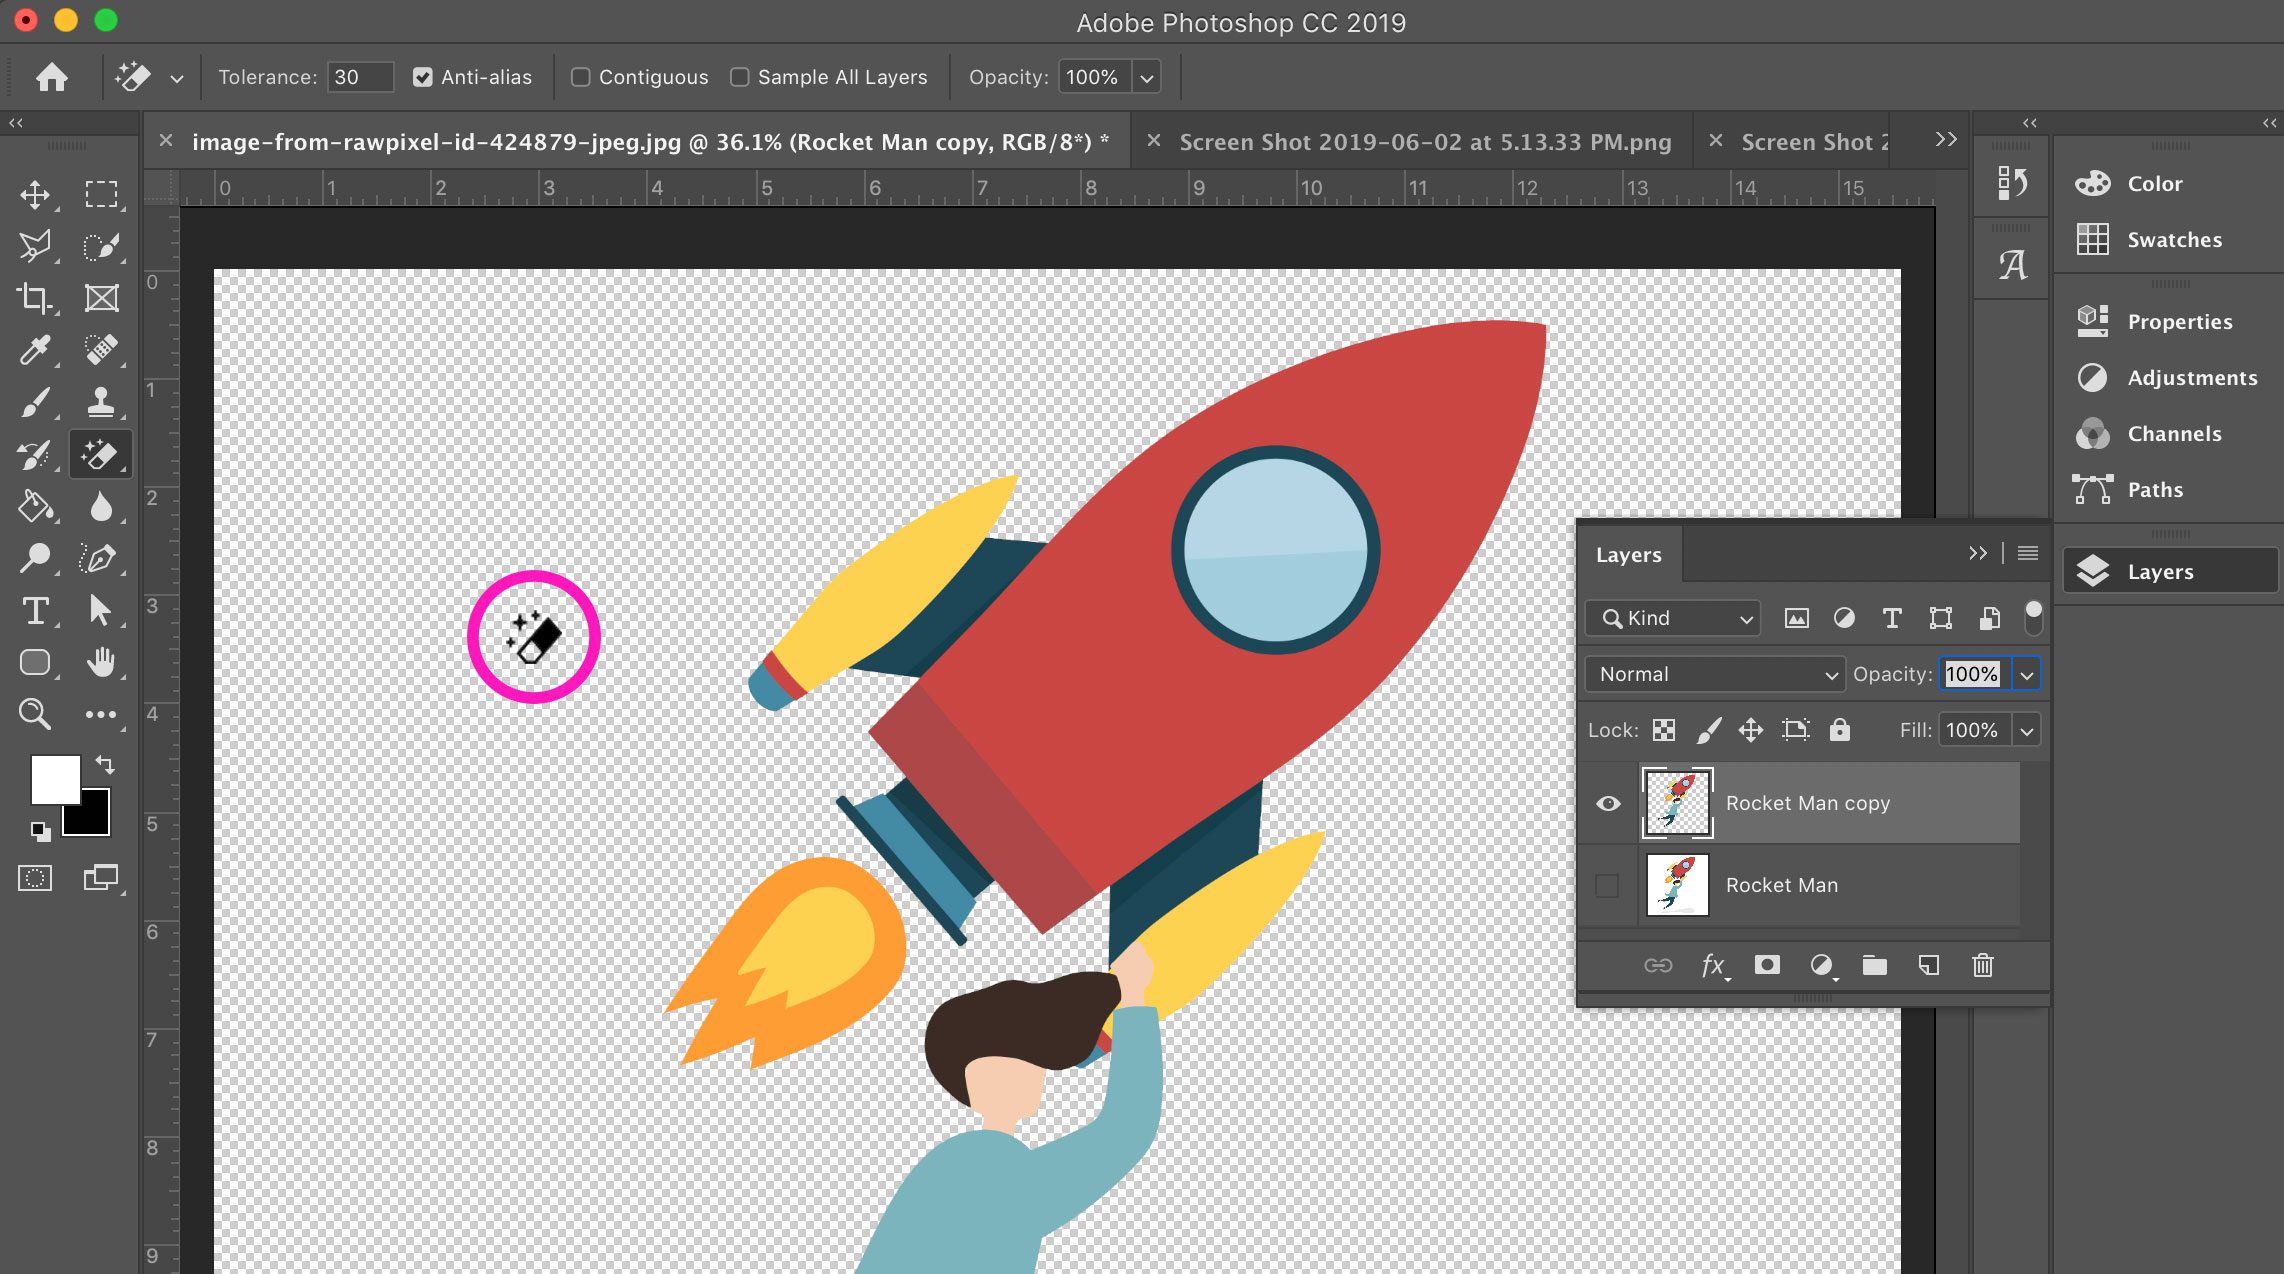
Click on the white area with the magic eraser tool selected
Simply look!
Our image has a grey shadow which disappears with the magic eraser. If your image has a light colored section like this, it will besides disappear. For this reason, you might want to try the Groundwork Eraser Tool instead.
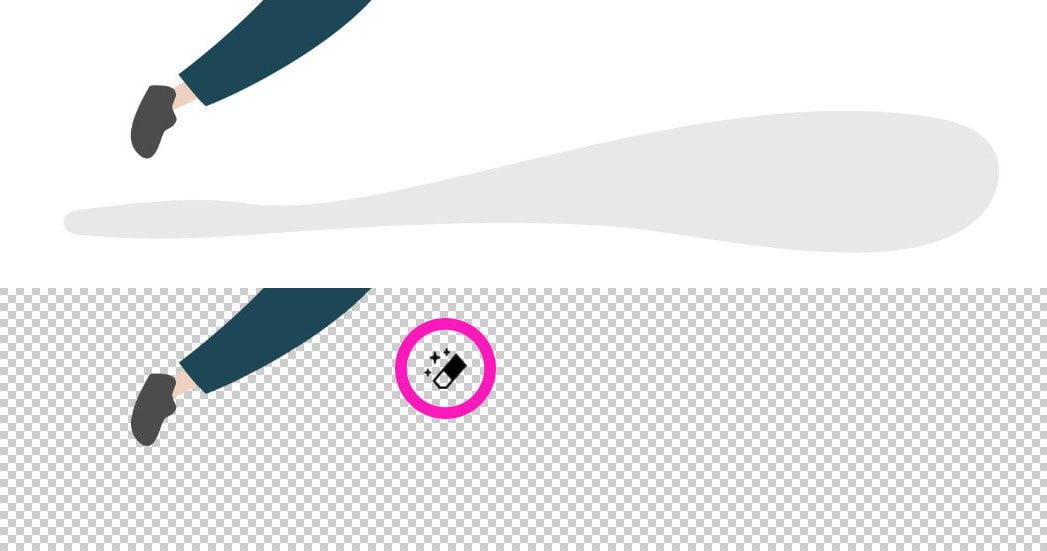
If your image has a very calorie-free surface area, the magic eraser might Non be the correct tool!
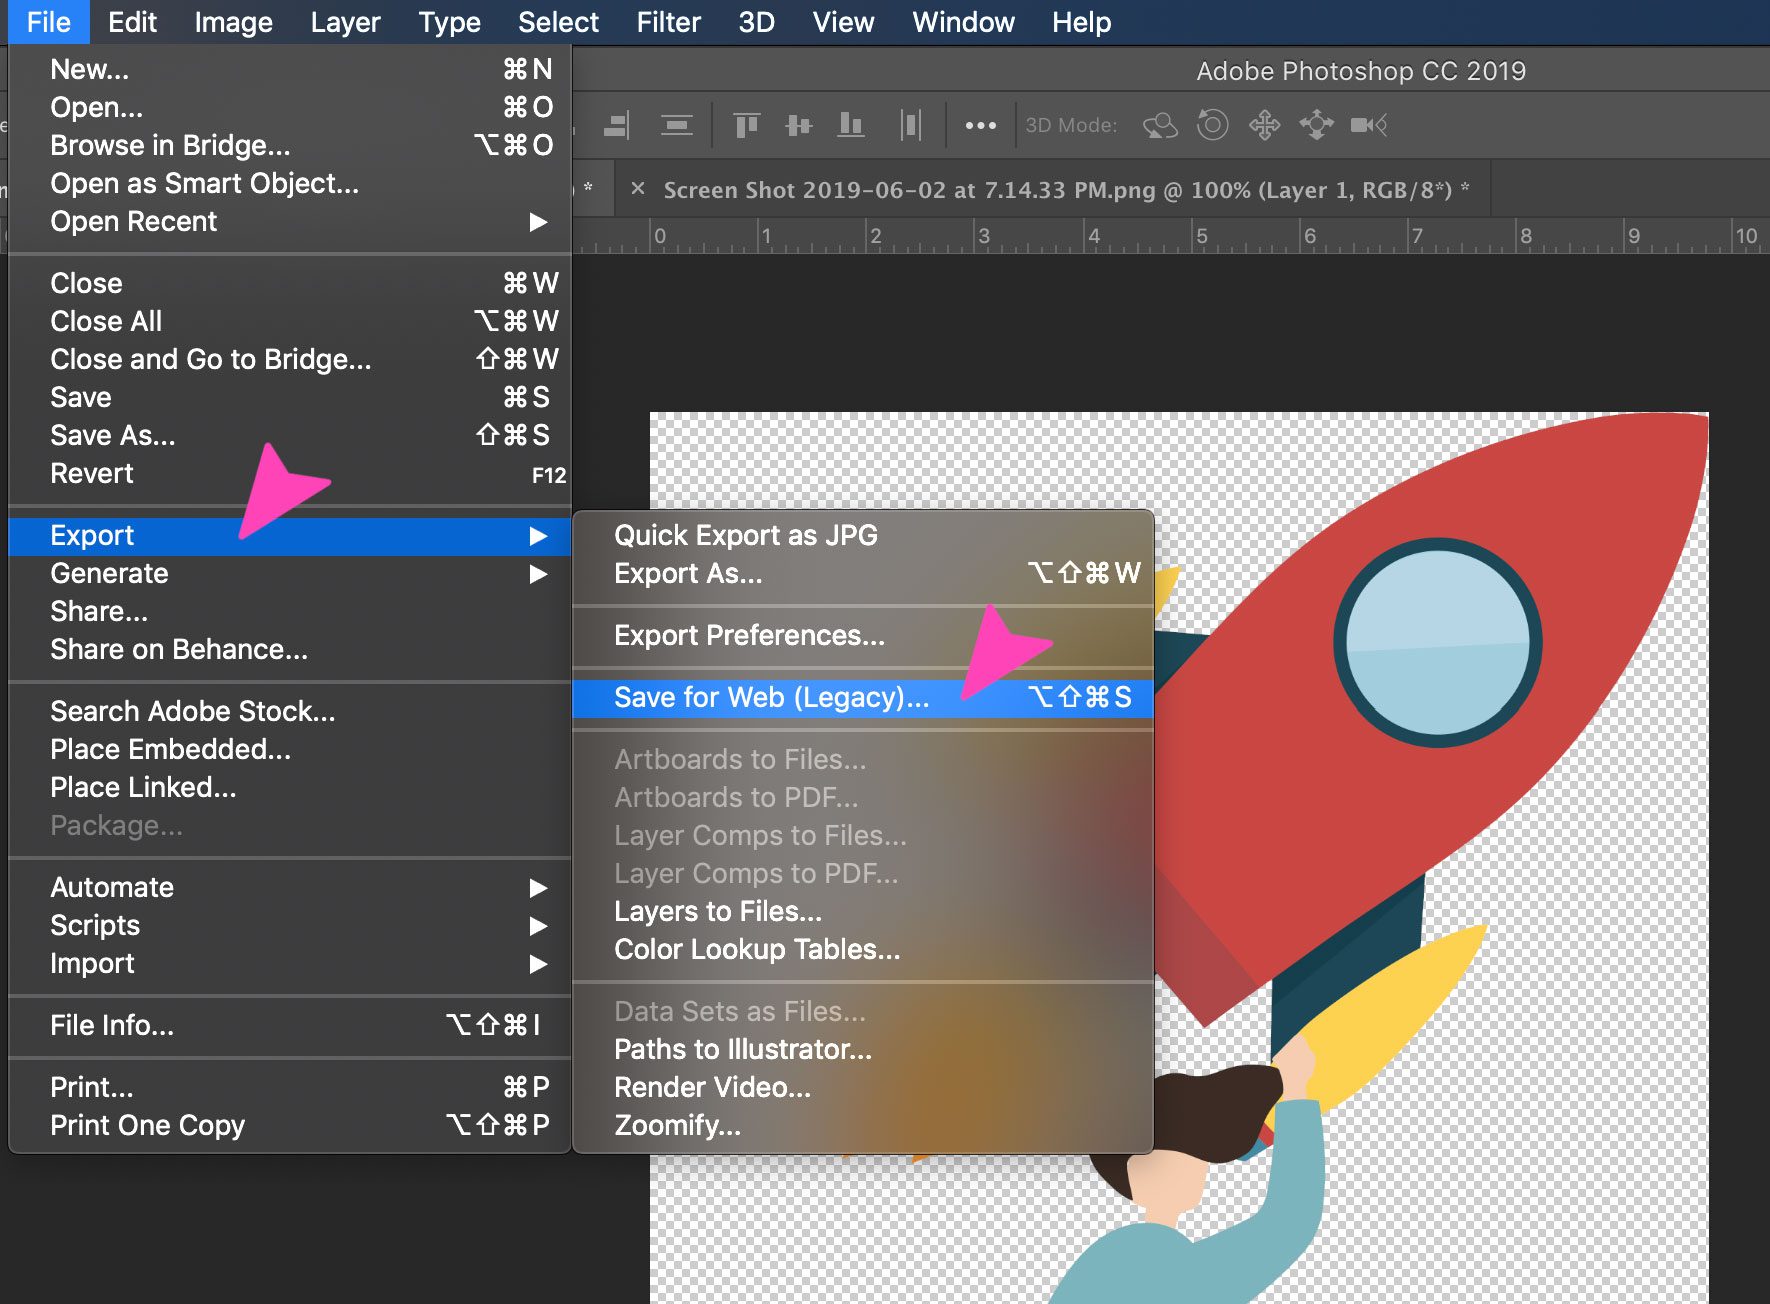
Step five: Trim and relieve equally PNG
Click on the trim option under the paradigm tab. This will cut off the extra transparent $.25 around the cutout. Consign the artwork as a PNG file by clicking
Save for Web nether the file tab and choosing PNG. If you save equally a JPEG, all your difficult work volition be for zero every bit it will save with a white background, PNG keeps the transparency.
![]()
Trim the prototype based on transparent pixels on all sides
Export and Save for Web

Choose the PNG option, click save at the bottom, name your file and click the bluish salve button
How to Remove the White Background from an Image with the Background Eraser Tool
Footstep i: Repeat The Beginning Ii Steps From the Magic Eraser Option
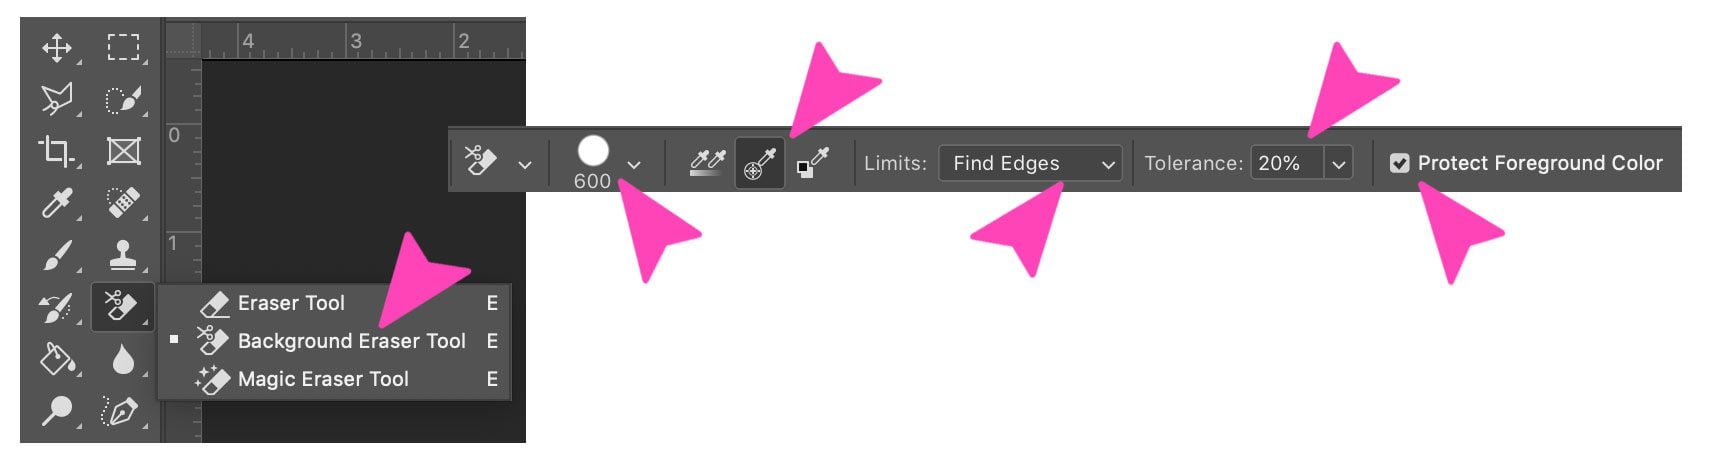
Step 2: Select the Groundwork Eraser Tool.
You can observe it in the eraser tab of the toolbar. The Background Eraser cursor looks like a circle with crosshairs in the centre, these crosshairs are what controls the tool. It samples the color direct beneath it, in this case, the white expanse.
Since we are erasing the white groundwork behind a colorful graphic, we accept to choose the following preferences for the background eraser tool:
Size: 300-800 pt.
Sampling: Once or Groundwork Swatch
Limits: Detect Edges
Tolerance: 20%
Protect Foreground Color
Also, make sure the colour black is in the foreground at the bottom of the toolbar.
Select the background eraser tool and the preferences
Footstep 3: Erase the White Background
Place the cursor over the white area and press the mouse push button. Pressing the mouse button, elevate the cursor over all the white area. Since nosotros selected 20% tolerance, the eraser volition not touch on other colors which are not white. If the tolerance were college, the colors would exist afflicted a niggling. Try different tolerance levels for different images depending on the colour of your main graphic. If y'all observe that you have some white pixels left over, just erase them with the normal eraser carefully.

Move the cursor with the crosshairs around the background until you have erased it all.
Step 4: Repeat the final two steps of the Magic Eraser choice above
How to Remove Whatsoever Background from an Image with the Quick Selection Tool
A white background is non always perfectly white, sometimes it's cloudy or with darker edges. For this kind of white background, you lot need a different tool and technique. Ane which you lot have more control over than the eraser tools. Coming up, the quick selection tool. For this tool, we chose an image with a background that isn't perfectly white. If you lot would similar to follow along with this tutorial, yous can get the prototype hither for free in Rawpixel.
Step 1: Open the image
Select the paradigm from your computer and open it on Photoshop. Heart the graphic in the artboard.
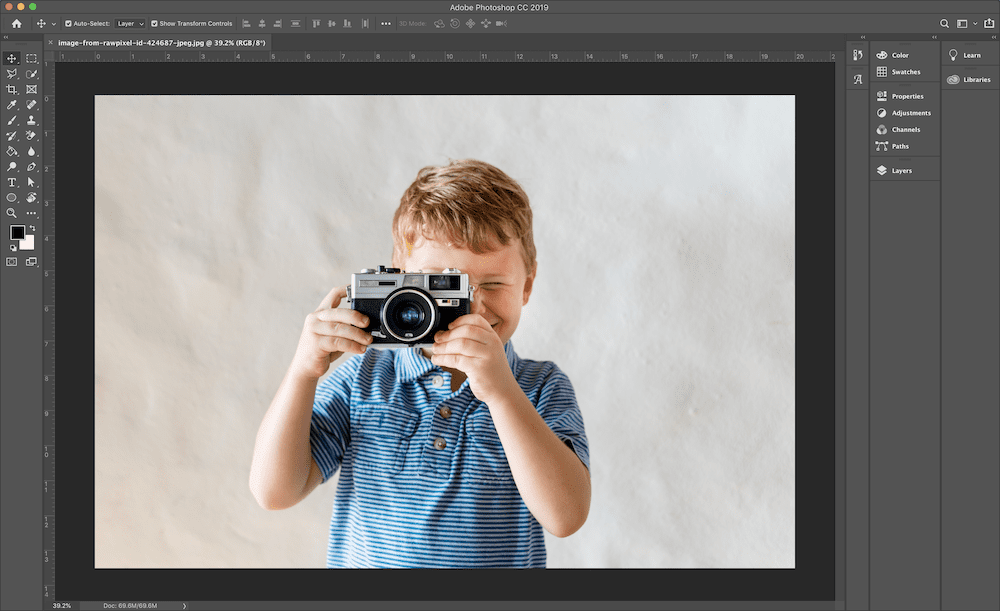
Open the prototype and center it on your Photoshop artboard
Footstep 2: Duplicate the layer
Unlock and duplicate the image layer and hide the outset one, keeping it below the ane you will be working on. This layer with the original prototype is a safety net just in instance you brand a mistake while erasing the groundwork. Proper name the layers with descriptive names then you lot know which is which. Check the screenshot on step 2 of Removing the white groundwork with the Magic Eraser tool if y'all aren't sure how to practise this.
Step iii: Cull the Quick Pick tool
Select the Quick Option tool from the toolbar. It's housed together with the Magic Wand tool. Adjust the preferences for the cursor like this:
New Selection
Size: 100 px
Hardness: 100%
Spacing: xx%
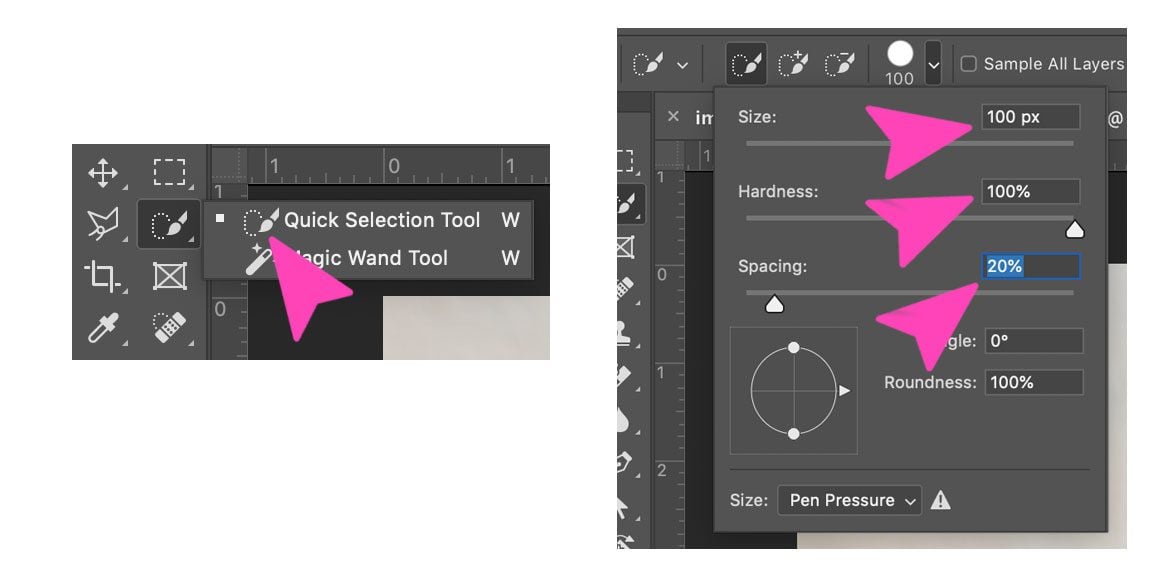
Select the Quick Selection tool and the preferences
Pace 4: Select the object
Pressing the mouse button, drag the cursor over the object you want to split from the background. This technique selects the object instead of the background in order to take more command over the choice. This is practical when the background, white or otherwise, is not even.
Continue the cursor on the object and on the inside border of the option then that it doesn't go also far over onto the background. In one case you allow become of the cursor, the options on the preference bar will change, you volition only have the choice of calculation or subtracting to and from the choice. The 'new selection' option will disengage the selection you already have.

Using the quick selection tool, drag over the entire object until it's all selected.
Step 5: Refine the selection
Information technology'due south very probable that the choice isn't perfect, so now nosotros will refine information technology with the castor tool. Click q on the keyboard and the image will at present evidence a cerise area. This scarlet area is the non-selected part of your image.
Zoom into the prototype and cull the Castor tool (or printing b) to bear on up the edges. Apply white to add to your choice (erasing the red) and black to unselect (calculation red). Reduce the brush size to take more control in tight spaces and tricky edges.
To finish it up, click q again to get rid of the ruddy and come across the pick with the dotted line. Double click on the pick and click on the feather choice. Adjust the feather to 3 and click ok.
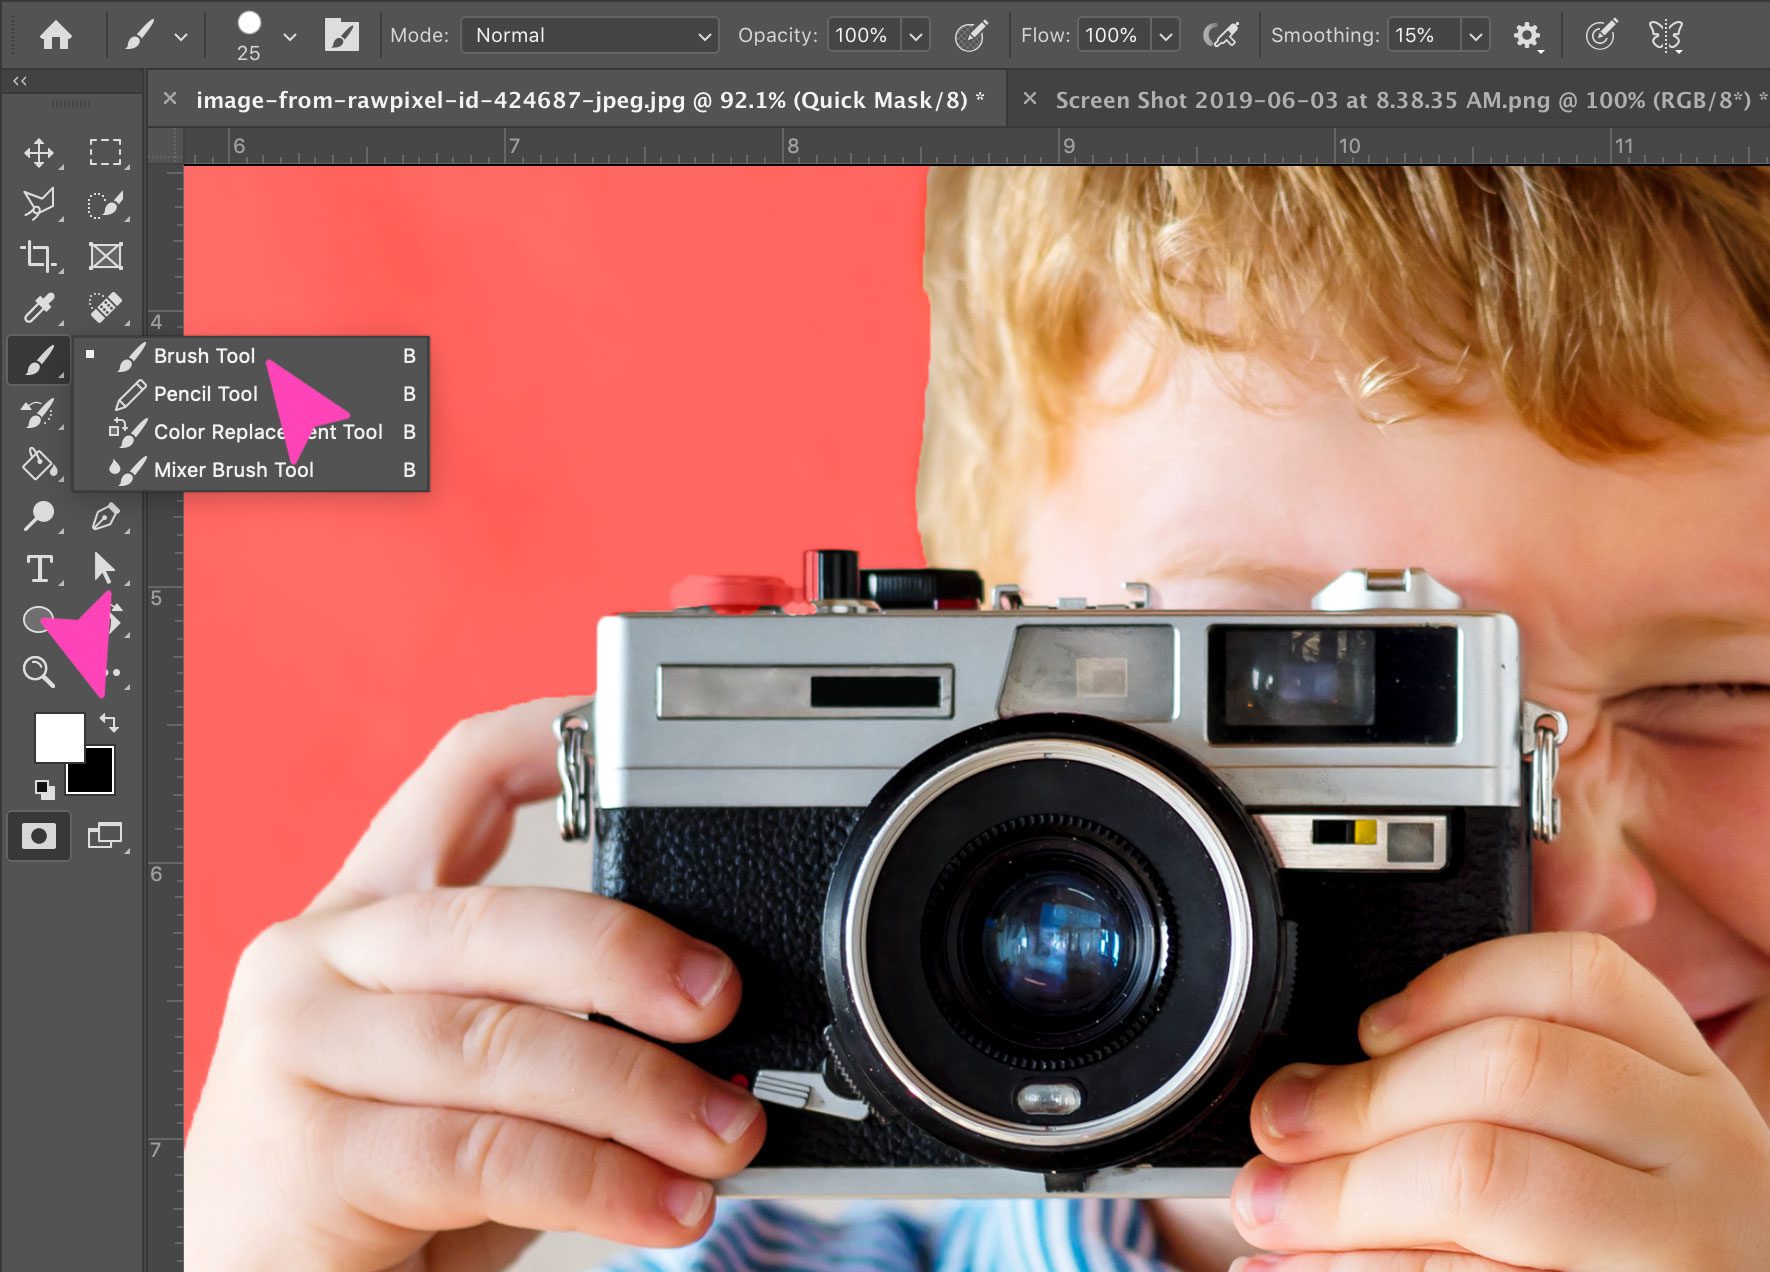
Refine the selection by pressing q and using the castor tool to add together or remove selected pixels
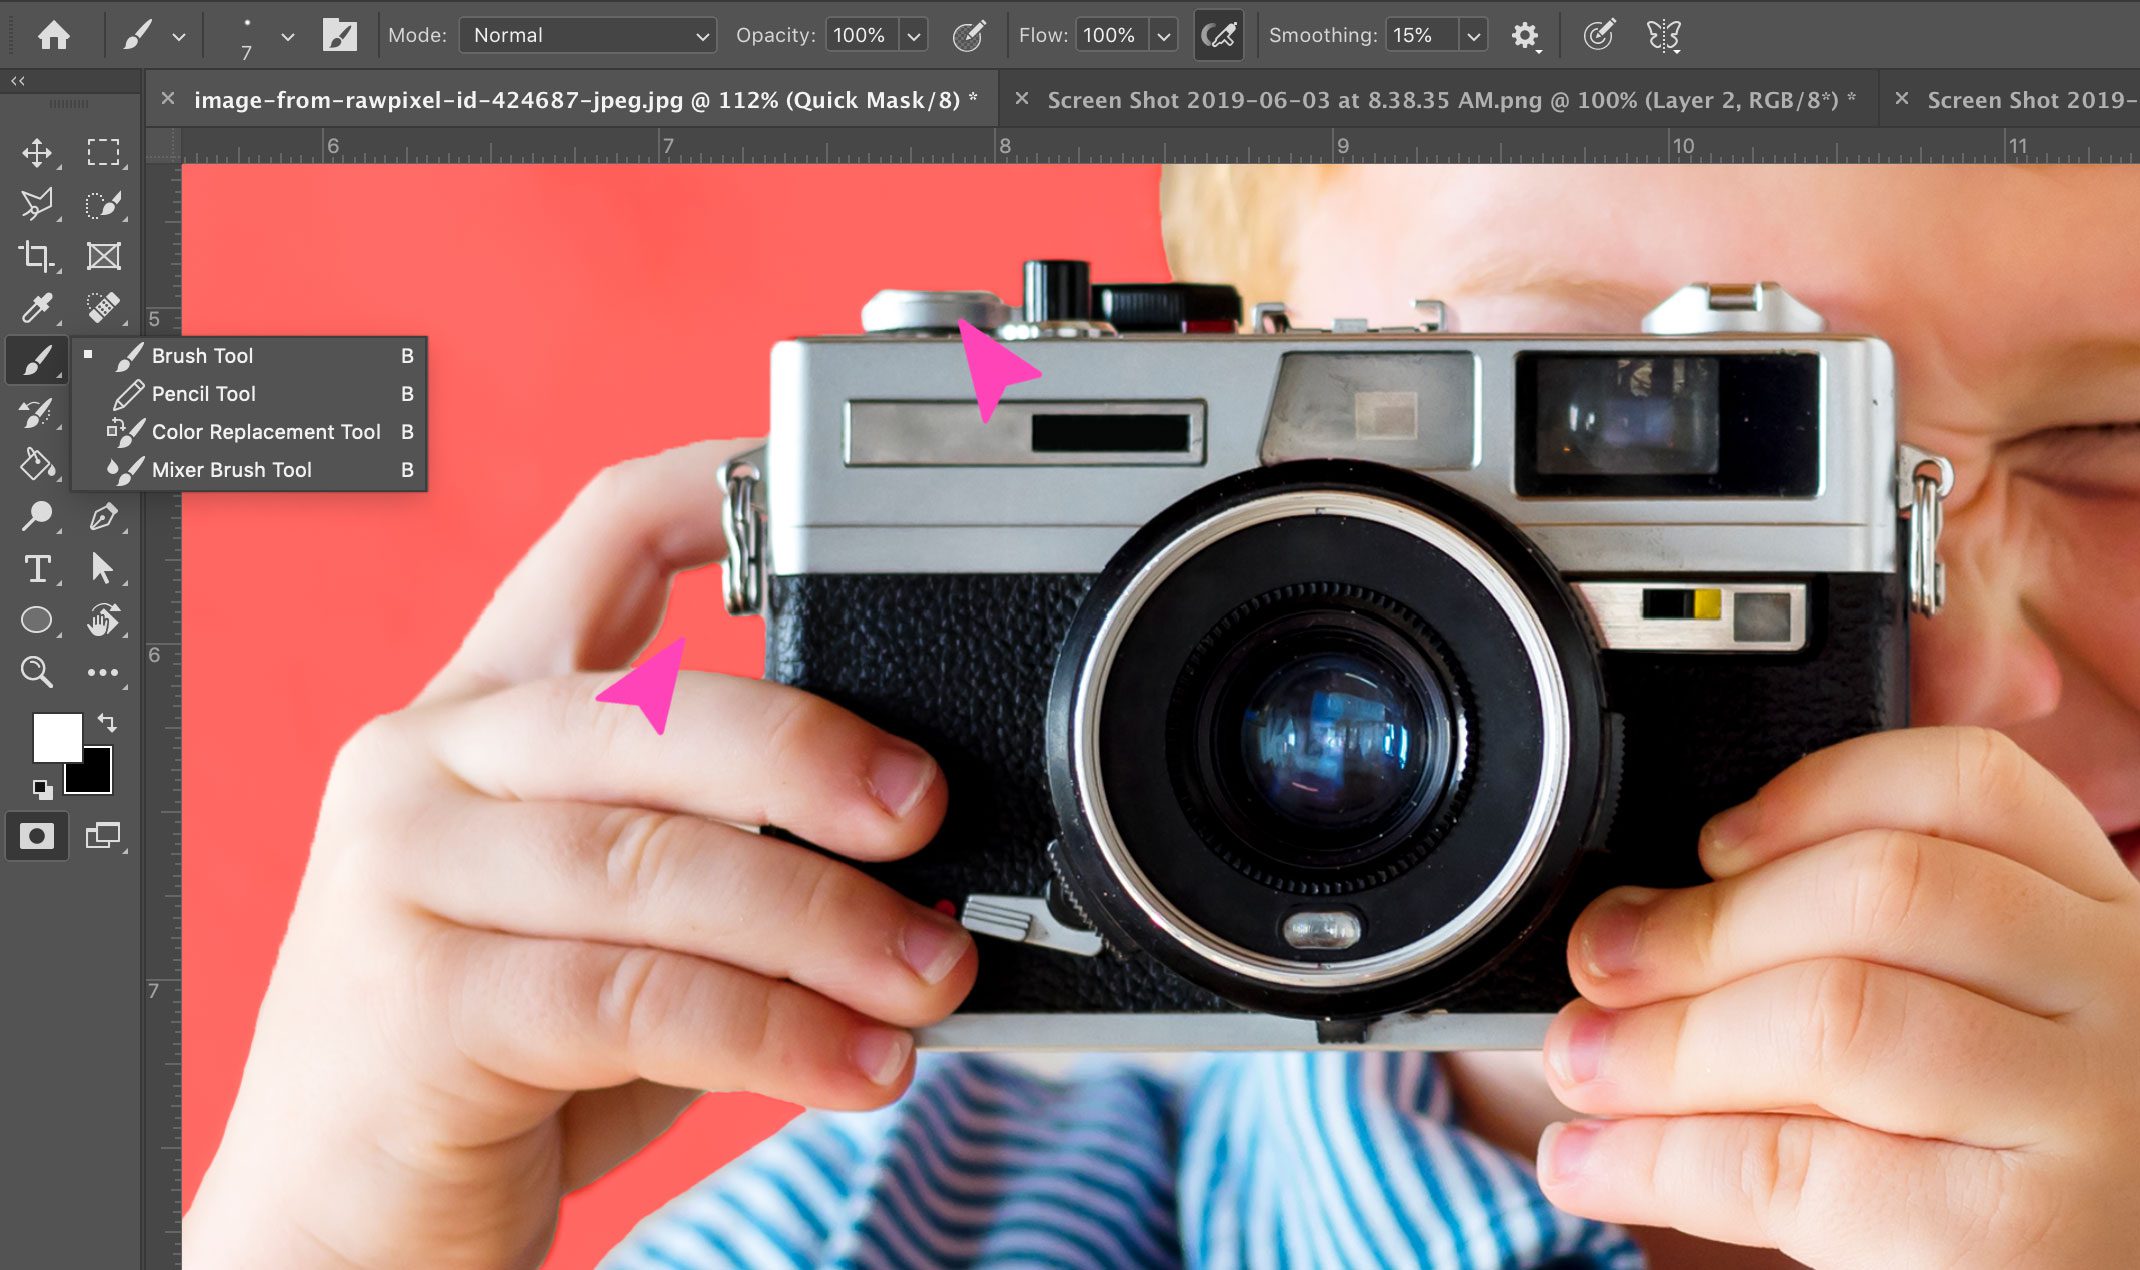
Use the castor with white colour to erase the red from the camera buttons and with black to erase the groundwork from between the hand and shoulder
Step six: Capsize the selection
Once you lot are sure that the object is selected properly, invert the option. When the background is selected, erase it and you lot will run across the transparency grid.

Press q to release the ruddy, right click on the choice and and so click on 'select changed'
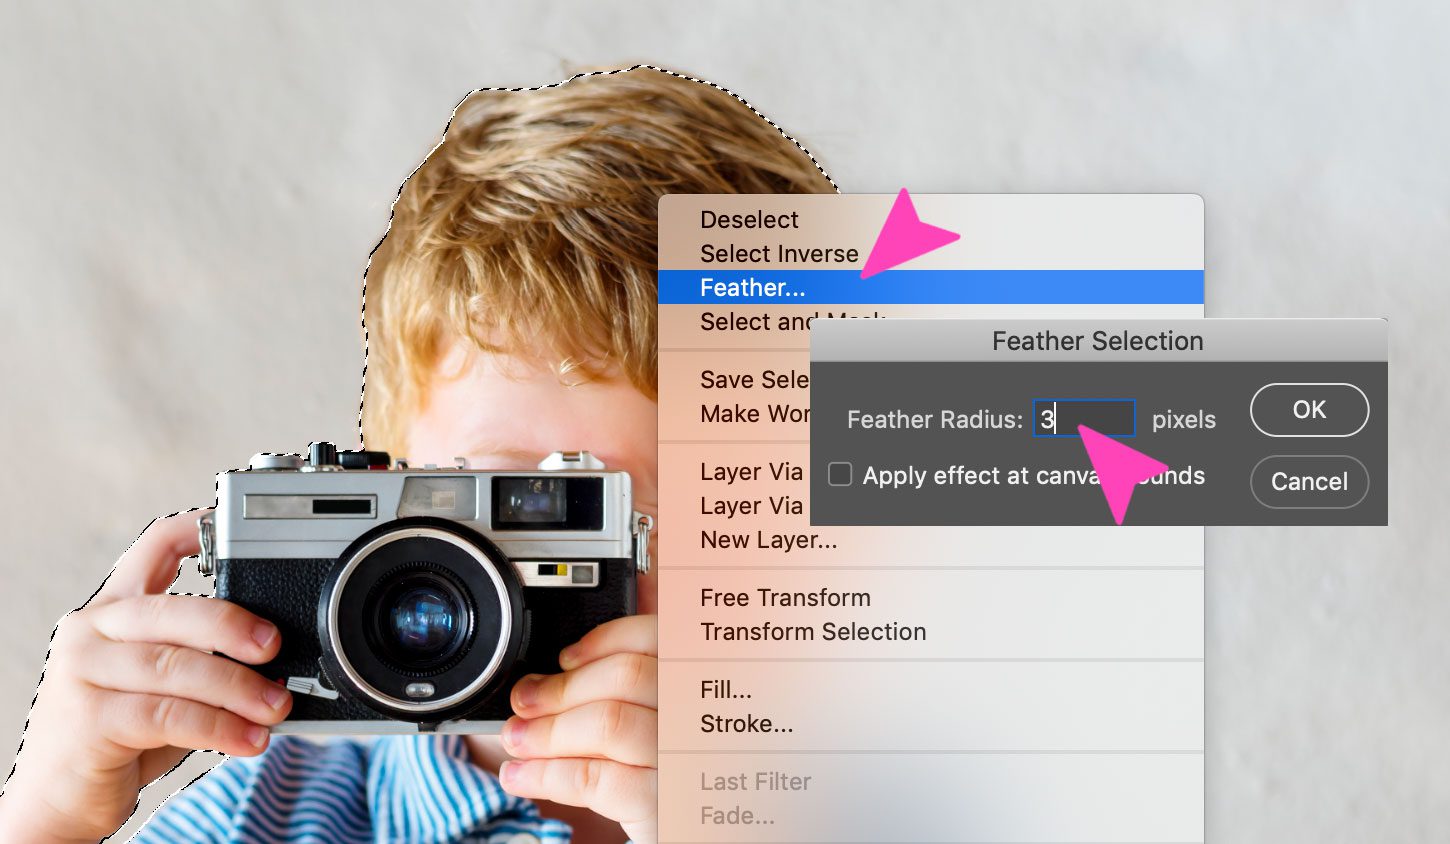
Utilise a slight plumage issue to the edges of the selection
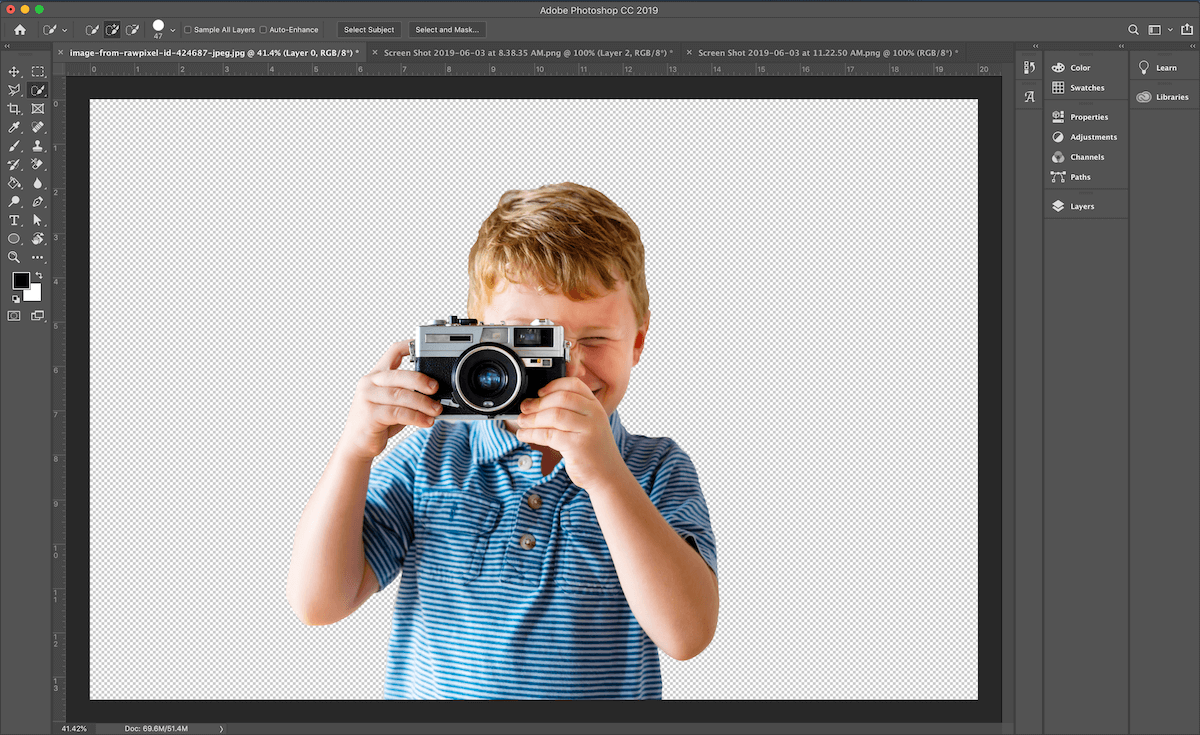
Afterwards inverting the pick, delete it and you will see the transparency grid
Step 7: Repeat the last two steps in Magic Eraser choice higher up
Determination
Some graphic designers rely on using the lasso and pen tool to select objects from a groundwork, but those tools are just non necessary when the background is a uncomplicated white color. With the iii tools nosotros have shown you in this guide, you take more than than enough information to erase any kind of white background. Remember y'all can download graphics with a transparent background in two unlike file formats, PNG and SVG. If y'all don't accept the latest version of Photoshop, you can get a free trial via the Adobe Creative Deject website.
Source: https://www.elegantthemes.com/blog/design/how-to-remove-the-white-background-from-an-image-to-make-it-transparent-in-photoshop
Posted by: rachalamoved.blogspot.com
0 Response to "How To Remove White From Photoshop"
Post a Comment